"/>
"/> "/>
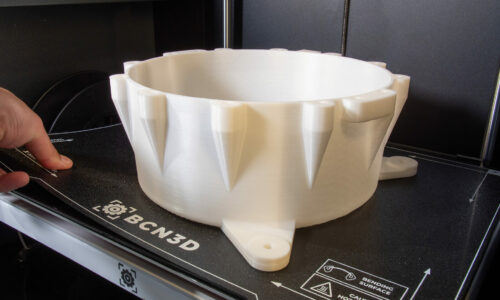
"/>3D printer chocolate extruder
In this new section of digital content, we will give you tips and tricks to get the best prints and get the most out of your printer. Today, printing chocolate with our 3D printer chocolate extruder.
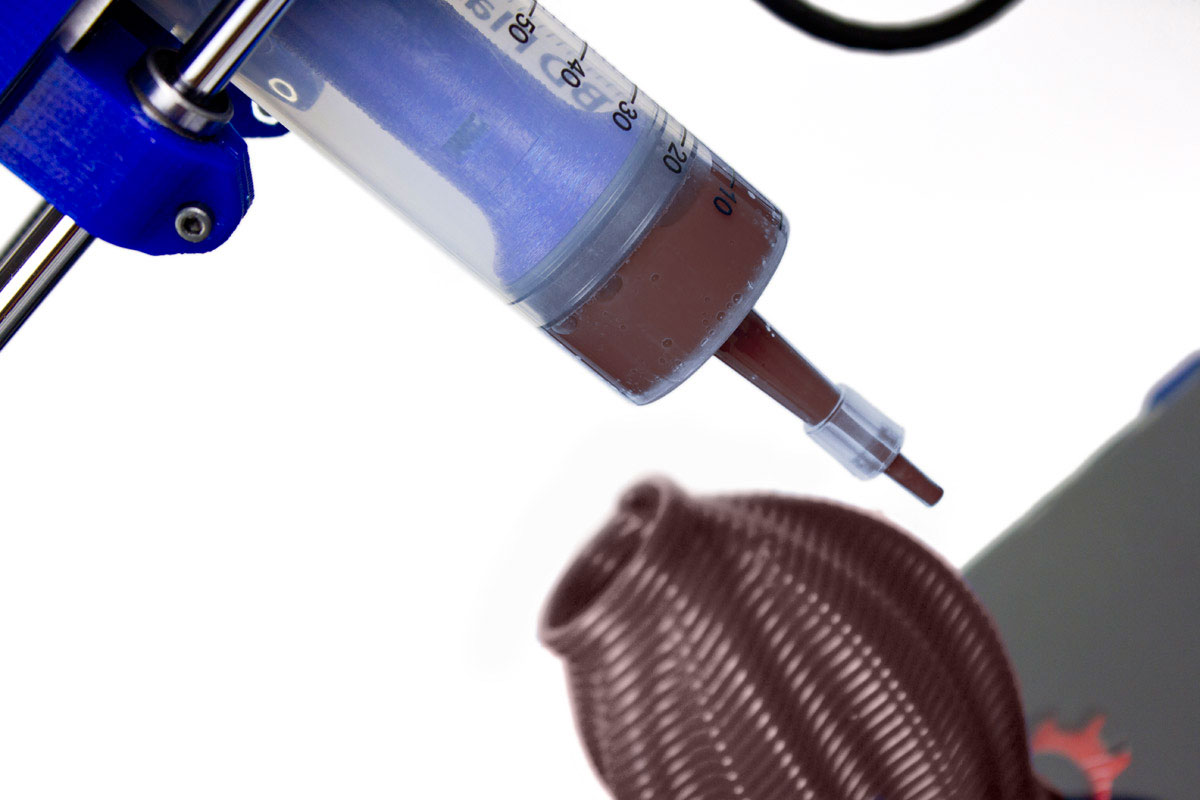
The paste extruder consists of an injection system that controls the quantity of deposited material through the pressure exercised by the piston of a syringe.
There are no predefined materials for the extrusion, you can print with any material that could flow and be deposited in successive layers. We have already printed with various foods and ceramics. The best results have been with chocolate, mashed potatoes, and clay. In this post, we will explain the workflow to print with the 3D printer chocolate extruder.

1. Get the chocolate
Index
The first thing to do is get or buy the chocolate. In the supermarket, we should buy a chocolate bar with a minor cacao butter content. The chocolate should not be chocolate for melting to prevent it from being very fluid. The chocolate that we have used is from the brand Simon Coll, a selection of adaptations to 3D printing in two varieties, milk chocolate and dark chocolate 50% cocoa.
2. Prepare the chocolate for the 3D printer chocolate extruder
We have the bar of chocolate in a solid state. Logically, for printing with chocolate, we need to have it in a pasty state so that it can be extruded from the syringe correctly. Once the 3D printer chocolate extruder is used we want the chocolate to solidify and then be consistent and brilliant. This process of solid-liquid-solid is more complex than we think. If it is not performed properly, once printed, the chocolate will not be as expected. What we must achieve is a good crystallization (the turn from liquid to solid) of the cacao butter contained in chocolate. We will achieve this by heating slowly the chocolate without exceeding 34ºC. In the case of surpassing them, we should carry out a temper of the chocolate. The process that we have used to warm the chocolate is as follows. There are different ways to do it.
Steps:
- 1. Chop or grate the chocolate.
- 2. Melt the chocolate in a bain marie with the water at 32ºC. To measure the temperature it is recommended to use a cooking thermometer. Here this process is slow but if you stir constantly accelerates.
- 3. When the chocolate reaches 32-33ºC (maximum 34ºC), we should put it inside the syringe of our paste extruder.
Things to consider:
- In the case of surpassing 34ºC, we should carry out a temper of the chocolate. Tempering is a gastronomic process of preparing chocolate and it is explained in different books and websites.
- Chocolate should never be in contact with water. If it happens, the chocolate will not solidify properly.
3. Prepare the paste extruder
It is important to prepare the paste extruder. Taking into account that we have the chocolate to 32-33ºC in the bain marie, we put it directly into 3d printer chocolate extruder paste syringe. It is recommended to cover the syringe with cardboard to keep the temperature of the chocolate. This process should be relatively fast because if the chocolate remains a long time in the syringe without extruding, it will begin to solidify.
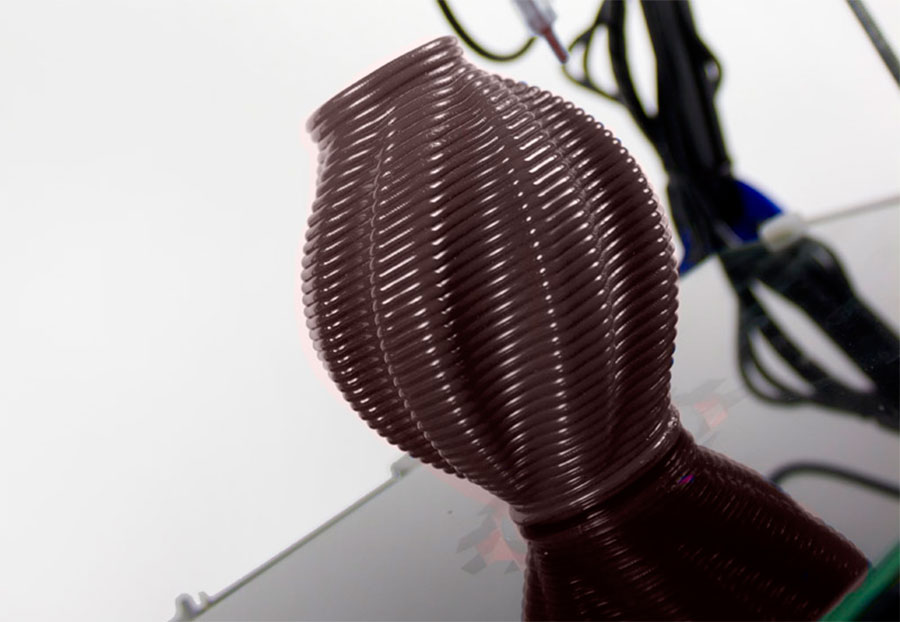
4. GCODE preparation and 3D printing
It is for Cura software. Must be taken into account that is an initial configuration from which you can start your printings with chocolate. You already know that the paste extruder is very experimental and you should know that each print with the paste extruder has a different configuration because it depends on the composition of the pasty material that you have prepared. However, the basic parameter that you may change from the configuration is the flow (amount of material extruded by the extruder). It can be modified directly on the BCN3D+ when is printing. To change it from the BCN3D+ screen, we should go to Tune –> Flow. If you want to extrude more chocolate, you must increase that flow number. Otherwise, extruding less chocolate should decrease the number.
Things to consider:
- Must be taken into account the ambient temperature. Recommended between 18 and 22°C.
- For the experts and curious, if you want to print above some cookie or cake you can do it. You should change the Cura gcode generation:
- In the Start/End-GCode tab, after the G28 Z0 line, you should add:
- G1 Z3; Move up 3mm
- G92 Z0; Call this position z=0
All of this means that you will print with a Z=3mm offset. If you want to print with more or less offset you just have to modify the number 3.
- Depending on the kind of chocolate you should reduce the printing speed.
5. After printing
Once you have the 3D printed chocolate piece, be careful when removing it from the base. Here you have a video stamping with chocolate. We were stamping candles for a program!
Enjoy 3D printing with chocolate! If you have any questions, do not hesitate to ask!