"/>
"/> "/>
"/>The 3D printing brim, skirt and raft: 3 bases to improve your adhesion
A well-adhered first layer is key in 3D printing to making sure your print turns out perfect. There are 3 distinct bases that, when strategically used, and depending on the piece and filaments, can greatly improve the adhesion to your model: the 3D printing brim, and raft modes. One should consider their particular model and filament type when deciding which of these options to use. They all have their own benefits and disadvantages so be sure to weigh each of these options to find the one that suits your print job best.
The 3D printing skirt: A mode of its own
Since the skirt mode is very different from the other two options here, let’s take a look at this one first. It can be described as an amount of filament surrounding the piece, having no physical connection to it. Skirt obviously provides no effect on adhesion except as a visual indicator of whether your filament is sticking and is primarily used as a tell if all the other variables are properly functioning including material flow, calibration of your printer, and whether everything is properly leveled. Be sure to implement the use of this mode to save time and money as it will let you know immediately if something is going to go wrong with your print.
3D printing brim or raft?
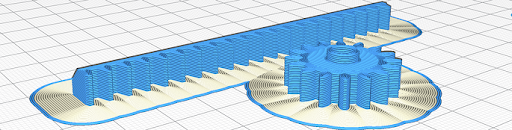
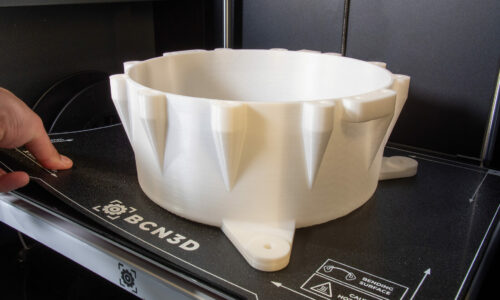
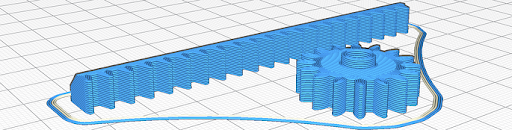
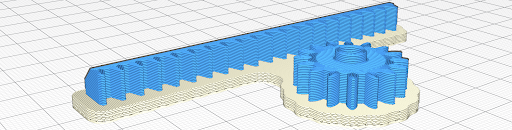
Our other 2 modes are literally printed as part of your piece, unlike skirt. Raft and brim’s general visual description which can be found in the names themselves. Picture the piece on a small boat, hence the name raft. The piece is literally laid on top of a number of layers meant to be disposed of following the completion of the print, thus the final piece never actually touches the plate. The brim is also exactly as stated…a brim, there is no layer underneath the print, only a connecting extension outside the perimeter of the base of the print. This parameter is not a heavy base as in the raft mode but rather a layer or 2.
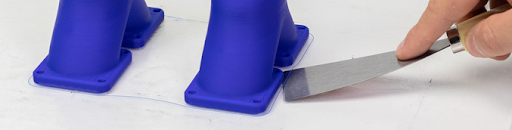
The 3D printing brim function is an extremely useful mode as it uses less material, helps create that desired bottom layer, and most importantly, it’s easily removable. Being that the mode creates a flat area on the first layer around the model’s base, it both increases the contact area and improves the adhesion. Filaments like PA and PP benefit with this mode as it reduces the chances of warping within the final piece. It does this by pinpointing the hold on the outside layer thus keeping the piece in place. The primary types of pieces that the use of brim is suggested include parts with smaller or narrow bases and riskier pieces as it adds an extra level of security and it is typically easy to remove. One can bend the undesired addition back and forth until it is removed, if this isn’t optional, scissors, a knife, or even sanding will be perfectly efficient. A brim width of 10 to 20 mm will be adequate with the majority of prints. In general, it doesn’t hurt to add brim to any piece unless requiring a heavier level of adhesion as our next mode does.
The raft mode is thicker than brim but has the same concept. Adhesion, adhesion, adhesion. One would use this mode for pieces that don’t have a completely flat bottom surface or with filaments with poor adhesion. It also bears the brunt of any issues that could happen with the first layer as obviously this first layer isn’t actually part of the finished product. Raft is also very reliable in containing instances of warp. One material that this is extremely useful for is ABS as this particular filament is extremely prone to shrinking and this mode enables the absorption of tension thus avoiding a ruined piece or a chipped or broken build plate.
Disadvantages
Taking into account the negative variables will help you make a better decision on which mode is best for your particular piece. So what are some of the downfalls of each of these bases?
While raft is helpful in guaranteeing strong adhesion, one may find the additional material somewhat difficult to remove from their finished product. The process can be tedious and there is always the risk of somehow damaging the unit. Also because this base is in contact with a large portion of the piece, the quality may be less than desired on products that are required to be aesthetically pleasing.
The brim mode offers the same disadvantages just to a lesser extent. The part will have to be post-processed in the connection zones, when you remove it, there is the risk of damaging the unit, and of course, there will always be waste material. One should be wary of these disadvantages when choosing your adhesion base.
Conclusion
While skirt can assist in saving material and giving a slight preview if everything is in working order, brim and raft are very versatile adhesion modes that one should consider when printing your piece. They each offer benefits and disadvantages, but with tinkering and experience, will provide your desired adhesive effects in having regularly successful prints.
For more in-depth tips and tricks, be sure to visit our Knowledge Base.